Let me tell you, this Cheeseburger Pie Recipe is a game-changer when dinner needs to be quick, tasty, and comforting all at once. Seriously, it brings that classic cheeseburger flavor into a warm, sliceable pie — perfect for busy weeknights or casual weekend meals.

Jump to:
Why You'll Love This Recipe
I've made this cheeseburger pie more times than I can count, and each time it feels like a little celebration around the dinner table. What’s amazing is how simple ingredients come together to create those familiar, comforting flavors we all adore from good old cheeseburgers — without the hassle of flipping patties or assembling buns.
- Time-Saver: From prep to plate in just about 30 minutes — ideal when you're short on time but craving something homemade.
- Easy Ingredients: You probably already have everything in your pantry and fridge, making this a terrific “no-stress” meal.
- Kid Friendly: The cheesy, meaty goodness appeals even to picky eaters, and it’s easy to slice into perfect portion sizes.
- Customizable: Whether you want to add veggies or spice it up, this recipe is a wonderful base for your own spin on cheeseburger pie.
Ingredients & Why They Work
This recipe leans on a handful of classic ingredients that harmonize beautifully. Each part has a job: the beef provides heartiness, the cheese brings that melty cheeseburger vibe, and the Bisquick batter binds it all up with a tender, golden top. Here’s the lowdown on why these work so well together—plus some shopping tips.
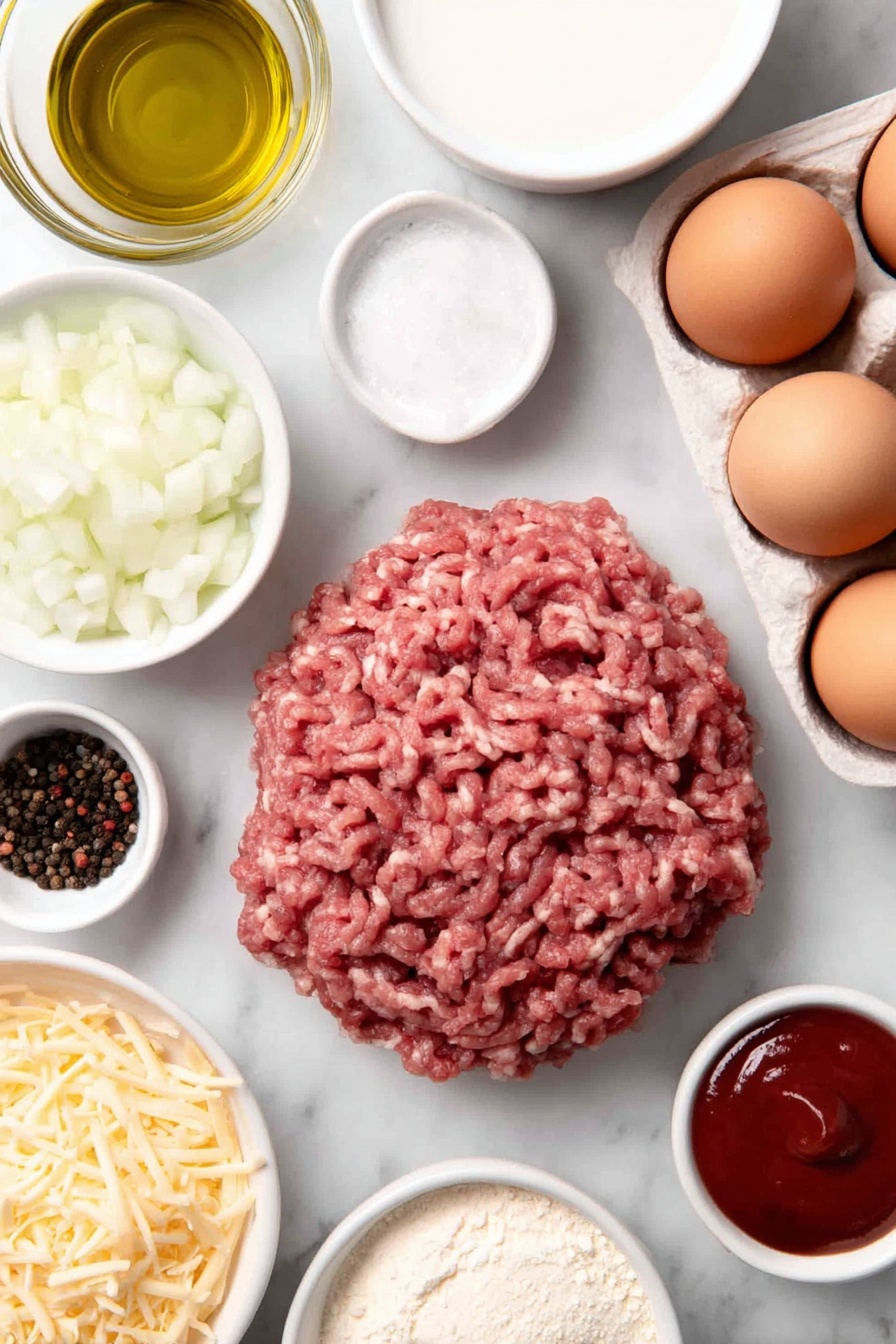
- Ground Beef: Using 80/20 blend gives you juicy flavor without too much grease; leaner beef can dry out.
- Chopped Onion: Adds sweetness and a bit of texture; if you’re not a fan, you can use shallots or even scallions.
- Salt & Pepper: Simple seasoning brings out the best in the meat; don’t skip these or the garlic powder.
- Garlic Powder: A subtle flavor boost that blends seamlessly into the background.
- Ketchup: The secret sauce that delivers a tangy, slightly sweet kick reminiscent of a classic cheeseburger.
- Shredded Cheddar Cheese: Sharp cheddar melts beautifully — pre-shredded works fine, but freshly shredded often melts better.
- Bisquick Mix: This versatile baking mix creates a fluffy, lightly crisp crust and topping all in one.
- Milk & Eggs: Bind the Bisquick into a smooth batter that sets perfectly once baked.
- Vegetable Oil: For browning the beef and onions evenly without burning.
Make It Your Way
What’s great about this cheeseburger pie recipe is that it’s like a canvas. I often add diced bell peppers or mushrooms to the meat for extra veggies. You might want to swap cheddar for pepper jack if you like a little heat or even sprinkle some bacon bits on top for a smoky twist.
- Variation: One of my favorite tweaks is stirring in some chopped pickles right into the beef mix before layering. It gives that tangy zing that reminds me of eating a burger at a favorite diner.
- Dairy-Free Version: Try using a vegan cheese substitute and almond milk to make the batter; it turns out surprisingly good if you’re avoiding dairy.
- Extra Veggies: Spinach or zucchini grated finely blends well and sneaks in nutrition without overpowering the cheeseburger flavor.
Step-by-Step: How I Make Cheeseburger Pie Recipe
Step 1: Brown the Beef and Soften the Onion
I start by heating the vegetable oil over medium heat, then tossing in the ground beef and chopped onion. You want to cook until the beef is nicely browned and the onion is soft but not mushy—usually around 5 to 7 minutes. Don’t rush this step; browning meat well means better flavor. Drain off any excess grease to keep the pie from getting too oily.
Step 2: Season and Mix in Ketchup
Next, sprinkle in salt, black pepper, and garlic powder. I love garlic powder here because it’s subtle but adds depth. Stir in the ketchup thoroughly — this is the secret sauce element that makes this pie taste just like a cheeseburger. Spread this mixture evenly over your greased pie dish.
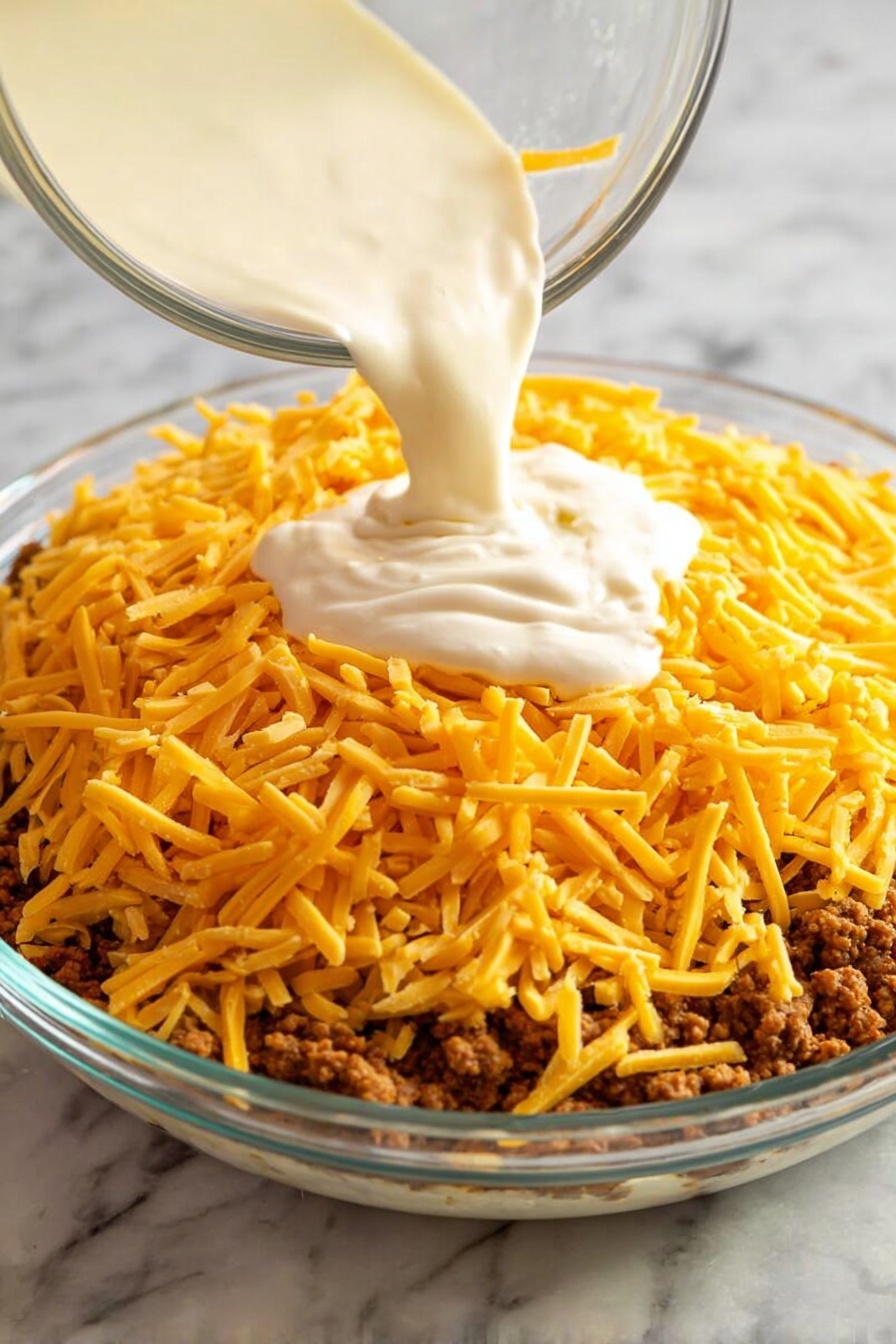
Step 3: Add Cheese and Prepare the Bisquick Batter
Sprinkle shredded cheddar cheese evenly over the beef layer — I’m telling you, this layer of gooey cheese is non-negotiable. Then, whisk together Bisquick, milk, and eggs in a bowl until smooth. Pour the batter carefully over the cheese layer; it should cover the filling entirely. This batter forms a soft, golden crust after baking that’s just perfect.
Step 4: Bake and Cool Slightly
Bake the pie in a 400°F (200°C) oven for 20-25 minutes. Keep an eye on the top — it should become golden and set firmly. To check doneness, insert a knife in the center; it should come out clean. Let it cool for about 5 minutes before slicing. This resting step helps those layers hold together so your wedge slices come out neat and satisfying.
Top Tip
Over the years, a few little tricks have made all the difference for me when making this cheeseburger pie recipe. These tips will help keep your pie perfectly juicy but not soggy, with that ideal golden top.
- Drain the beef thoroughly: This prevents excess grease from soaking into the pie, which can make it watery.
- Don’t overmix the batter: Stir until just combined to keep the topping tender and light rather than dense.
- Bake right away: Pour the batter immediately over the warm beef and cheese so it starts cooking evenly in the oven.
- Let it rest before slicing: This helps the layers to set up, making your slices cleaner and prettier.
How to Serve Cheeseburger Pie Recipe
Garnishes
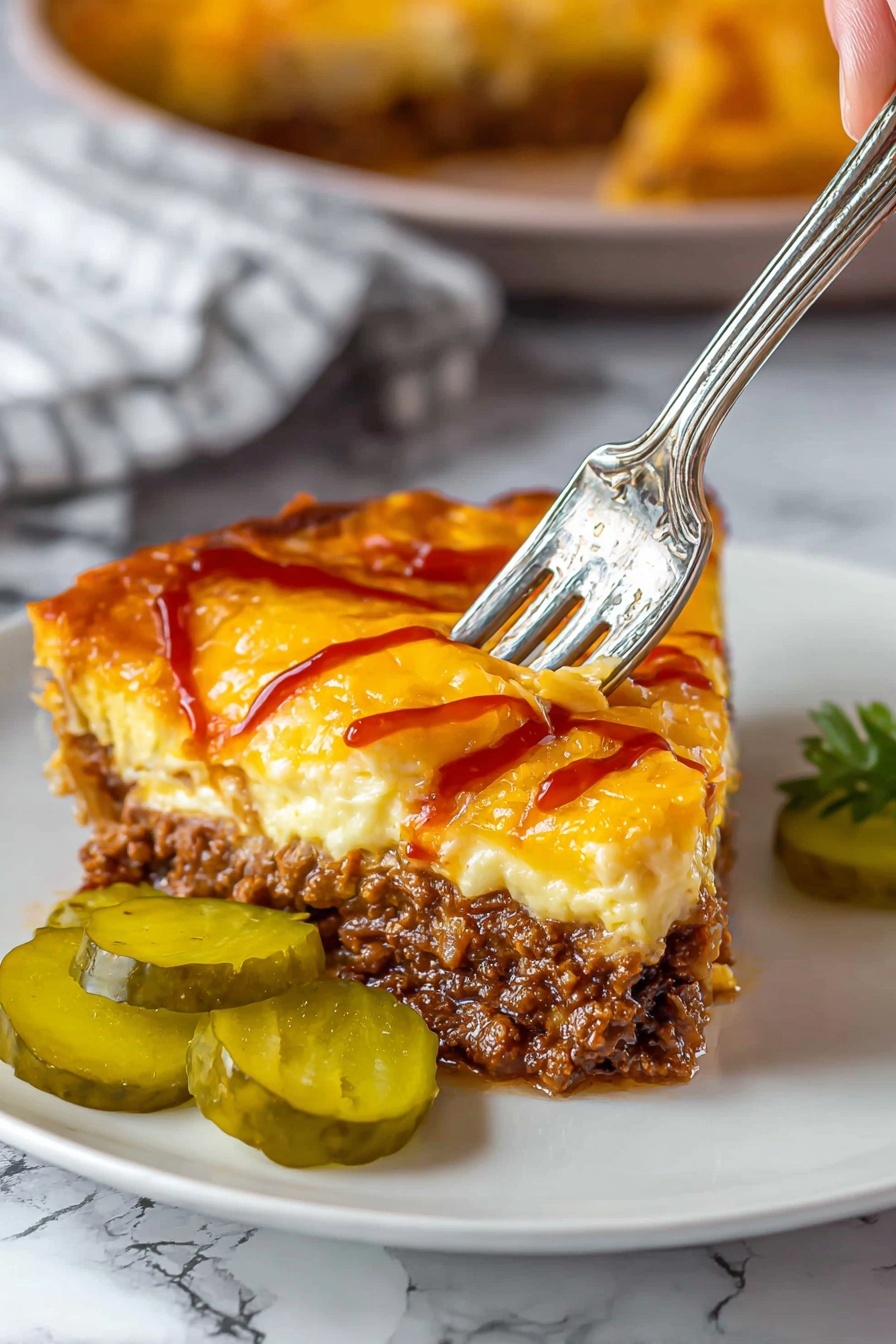
I love topping my cheeseburger pie slices with a little extra ketchup and a few dill pickle slices on the side — it really mimics that classic burger experience. Sometimes I add a pinch of chopped fresh parsley for a pop of color and freshness too.
Side Dishes
This pie pairs wonderfully with a crisp green salad or some steamed broccoli to balance out the richness. For extra comfort, oven-baked fries or sweet potato fries are always a hit.
Creative Ways to Present
For casual gatherings, serve the pie in small ramekins to make individual mini cheeseburger pies. It’s fun and mess-free! I’ve also served it with a side bar of burger toppings like sliced tomatoes, lettuce, and onions so everyone can customize their slice.
Make Ahead and Storage
Storing Leftovers
After the pie cools completely, I wrap it tightly with plastic wrap and store it in the fridge. It keeps well for up to 3 days and reheats beautifully, making it perfect for next-day lunches or dinners.
Freezing
I’ve frozen leftover cheeseburger pie slices wrapped individually in foil and placed in freezer bags. They last up to 2 months — just thaw overnight in the fridge before reheating.
Reheating
To keep the crust crisp, I reheat slices in a toaster oven or regular oven at 350°F for about 10-12 minutes. Microwaving works too if you’re in a hurry, but the crust won’t stay as crisp.
Frequently Asked Questions:
Absolutely! While cheddar is classic and melts well, you can try mozzarella for a milder taste, pepper jack for a spicy kick, or even a blend of cheeses for more complexity.
The recipe as written uses Bisquick, which contains gluten. If you need a gluten-free version, look for a gluten-free baking mix alternative to substitute the Bisquick.
Yes! You can assemble the pie up to the point of baking, cover it tightly, and store it in the fridge for up to 24 hours before baking. Just add a couple extra minutes to the baking time if chilled.
I love pairing cheeseburger pie with simple sides like a fresh green salad, coleslaw, or roasted vegetables. For something heartier, fries or onion rings are classic choices.
Final Thoughts
This Cheeseburger Pie Recipe holds a special place in my recipe box because of how quickly it comes together and how deeply satisfying it is to taste. It’s a warm, cheesy hug in pie form — perfect for those evenings when you want something familiar and delicious without fuss. Give it a try, tweak it to your liking, and I’m confident it’ll become a staple in your home just like it has in mine.
Print
Delicious Recipe
- Prep Time: 10 minutes
- Cook Time: 25 minutes
- Total Time: 35 minutes
- Yield: 6 servings
- Category: Main Course
- Method: Baking
- Cuisine: American
Description
Cheeseburger Pie is a hearty and delicious savory pie combining browned ground beef, onions, tangy ketchup, and melted cheddar cheese, all topped with a fluffy Bisquick batter. Perfect as a comforting main dish, this easy-to-make recipe bakes to golden perfection and serves 6 people.
Ingredients
Meat Mixture
- 1 tablespoon vegetable oil
- 1 pound ground beef
- 1 medium onion chopped
- 1 teaspoon salt
- ½ teaspoon black pepper
- ½ teaspoon garlic powder
- ½ cup ketchup
Topping
- 1 cup shredded cheddar cheese
- ½ cup Bisquick
- 1 cup milk
- 2 large eggs
Instructions
- Preheat Oven: Preheat your oven to 400°F (200°C). Lightly grease a 9-inch pie dish or a similar baking pan to prevent sticking.
- Cook Meat Mixture: Heat the vegetable oil in a large skillet over medium heat. Add the ground beef and chopped onion. Cook until the beef is browned and the onion is soft, about 7 minutes. Drain any excess grease to keep the pie from being greasy.
- Season and Add Ketchup: Season the cooked beef and onion mixture with salt, black pepper, and garlic powder. Stir in the ketchup thoroughly to coat the meat evenly, then spread the mixture evenly into the prepared pie dish. Sprinkle the shredded cheddar cheese evenly over the top.
- Prepare Batter: In a medium mixing bowl, whisk together the Bisquick, milk, and eggs until the mixture is smooth and free of lumps. This batter will act as the pie's crust and topping.
- Assemble Pie: Pour the Bisquick batter slowly over the beef and cheese layers, ensuring that it fully covers the surface to create a cohesive pie.
- Bake: Place the pie in the preheated oven and bake for 25 minutes or until the top is golden brown and set. Check doneness by inserting a knife in the center—it should come out clean.
- Cool and Serve: Remove the pie from the oven and let it cool for 5 minutes before slicing. Cut into wedges and serve warm. Optionally, top with a drizzle of ketchup and serve with pickles for an authentic cheeseburger experience.
Notes
- Use lean ground beef (85% lean or higher) to reduce grease.
- For extra flavor, add diced pickles or mustard to the beef mixture.
- You can substitute Bisquick with self-rising flour plus baking powder in equivalent amounts.
- Serve with a side salad or steamed vegetables for a complete meal.
- Leftovers can be refrigerated for up to 3 days and reheated in the oven or microwave.
Nutrition
- Serving Size: 1 slice (⅙ pie)
- Calories: 350 kcal
- Sugar: 5 g
- Sodium: 620 mg
- Fat: 22 g
- Saturated Fat: 9 g
- Unsaturated Fat: 12 g
- Trans Fat: 0.5 g
- Carbohydrates: 16 g
- Fiber: 1 g
- Protein: 20 g
- Cholesterol: 115 mg


Leave a Reply