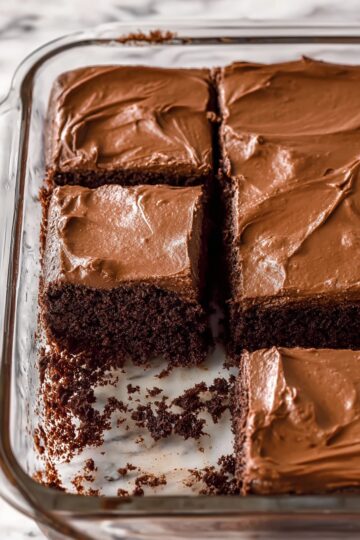
Nothing quite says festive warmth like a beautifully light and creamy cake to share around the holidays. This Christmas Cakes with Whipped Filling Recipe has become one of my favorite ways to impress friends and family with something that tastes fancy but feels effortless—trust me, you’re going to love how fluffy and smooth that whipped filling turns out.

Jump to:
- Why You'll Love This Recipe
- Ingredients & Why They Work
- Make It Your Way
- Step-by-Step: How I Make Christmas Cakes with Whipped Filling Recipe
- Top Tip
- How to Serve Christmas Cakes with Whipped Filling Recipe
- Make Ahead and Storage
- Frequently Asked Questions:
- Final Thoughts
- Christmas Cakes with Whipped Filling Recipe
Why You'll Love This Recipe
From the first time I made this Christmas Cakes with Whipped Filling Recipe, I was hooked. It’s that perfect balance of rich cake paired with a light, whipped filling that’s not overwhelming but still indulgent—a combo that's honestly hard to beat during the holidays.
- Super Fluffy Filling: The whipped filling is airy and creamy, making every bite melt in your mouth.
- Simple Ingredients: You probably have most of what’s needed in your pantry, so it’s an easy go-to recipe.
- Customizable Flavors: You can tweak the vanilla or add subtle spices to make it your own.
- Perfect for Entertaining: It looks stunning and tastes even better, so guests are always impressed.

Ingredients & Why They Work
Every ingredient in this Christmas Cakes with Whipped Filling Recipe plays an important role, coming together to create a filling that’s fluffy, smooth, and just sweet enough. I’ve found that using quality vanilla extract and real butter makes a noticeable difference, so don’t skimp there if you can help it!

- Butter: Using softened, unsalted butter gives the filling its creamy texture and rich flavor. Make sure it's really soft for easier whipping.
- Vanilla Extract: Pure vanilla extract adds warm, aromatic notes—you can experiment with almond or peppermint extracts for a seasonal twist.
- Confectioners’ Sugar: Sifted to avoid lumps, this sweetener dissolves effortlessly into the butter for a silky finish.
- Milk: Adds moisture and helps thin the frosting to just the right spreading consistency; whole or 2% works best.
- Pinch of Salt: Balances out the sweetness perfectly and brings all the flavors together.
Make It Your Way
One of the things I adore about this Christmas Cakes with Whipped Filling Recipe is how easy it is to customize. Whether you want to inject a little holiday spirit with a splash of peppermint or keep it classic vanilla, the filling really shines either way. It’s your canvas, so let your creativity flow!
- Flavor Variations: I love adding a teaspoon of cinnamon or a hint of orange zest to the filling for a festive touch—totally worth trying!
- Dairy-Free Option: Swap the butter and milk for plant-based substitutes like coconut oil and almond milk; the texture stays delightfully fluffy.
- Sweetness Levels: If you prefer less sweet, reduce the confectioners’ sugar slightly, just be careful not to lose that signature texture.
Step-by-Step: How I Make Christmas Cakes with Whipped Filling Recipe
Step 1: Whip the Butter to Fluffy Perfection
Start by beating your softened butter on medium-high speed with a whisk attachment. This takes about 3 minutes and is key to a smooth, fluffy filling. I like to stop midway and scrape down the bowl sides so everything gets evenly whipped—no butter left behind!
Step 2: Add Flavor and Sugar Slowly
Mix in the pure vanilla extract, then on low speed, slowly add your sifted confectioners’ sugar along with the milk and salt. This gradual addition prevents the sugar cloud and helps everything incorporate smoothly without mess.
Step 3: Whip Until Light and Spreadable
Once everything’s combined, crank up the mixer to medium-high or high and whip for at least 3 minutes. Personally, I went longer—about 7 minutes—and that extra airiness makes the filling feel like a dream. If you find it's too thick, add a splash more milk to get a better spread.
Top Tip
From making this a few times, I’ve picked up a few neat tricks to get the best whipped filling and avoid common pitfalls. These little tips will save you stress and yield perfect results every time.
- Room Temperature Butter: I can’t stress this enough—if your butter is too cold, the frosting won't whip properly and will end up lumpy.
- Sift Your Sugar: Helps prevent gritty texture and ensures your filling is silky smooth.
- Don't Rush the Whipping: Longer whipping adds air and lightness, so be patient for that perfect fluff.
- Adjust Consistency Carefully: Add milk sparingly; too much makes it runny, so go slow and test as you mix.
How to Serve Christmas Cakes with Whipped Filling Recipe

Garnishes
I love topping this cake with fresh berries or a dusting of powdered sugar for a snowy look. Sometimes I’ll add a sprinkle of toasted nuts or edible gold flakes to turn up the festive vibe. These little touches add texture and elevate the presentation beautifully.
Side Dishes
When I serve this cake, a cup of spiced tea or rich hot chocolate pairs perfectly. On the savory side, a plate of cheese and charcuterie can balance the sweetness if you’re hosting a holiday party. It’s versatile enough to save room for all the tastes of the season.
Creative Ways to Present
For special occasions, I like layering this whipped filling between thin cake layers in a clear trifle dish to showcase the fluffy texture and colors. Another idea is making mini individual cakes or cupcakes filled with the whipped frosting for an elegant touch that's easy to pass around.
Make Ahead and Storage
Storing Leftovers
Leftover cake with whipped filling keeps best in an airtight container in the fridge. I usually consume leftovers within 2-3 days—the whipped filling stays fresh and creamy if you give it a quick rewhip with a handheld mixer to restore fluffiness.
Freezing
Freezing this cake is possible but a bit tricky because the whipped filling can lose some texture. If you decide to freeze, wrap individual slices tightly and thaw them in the fridge overnight, then rewhip the filling if needed before serving.
Reheating
I don’t recommend reheating the cake itself, but bringing slices to room temperature before serving really brings out the flavor and softens the texture nicely. If the filling feels dense, a gentle rewhip helps bring back that lovely fluff.
Frequently Asked Questions:
Absolutely! This whipped filling can be made up to 2 weeks ahead and stored in the refrigerator. Just bring it to room temperature and rewhip for a few minutes before spreading on your cake to restore its fluffy texture.
A light vanilla or white cake complements the whipped filling perfectly, allowing the filling's delicate texture and flavor to shine. I recommend using the white cake recipe linked in the notes for a classic combo.
Definitely! This whipped filling makes a fantastic cupcake frosting since it’s light, fluffy, and easier to spread than traditional buttercream. Just make sure to chill cupcakes after frosting to keep everything fresh.
If your filling is too thick, gradually add a little milk (a teaspoon at a time) while beating to loosen it up. If it’s too runny, adding more sifted confectioners' sugar and whipping it longer usually helps bring it back to spreadable consistency.
Final Thoughts
This Christmas Cakes with Whipped Filling Recipe holds a special place in my holiday traditions. It’s easy to make but the end result feels luxurious—a perfect treat to bring a little extra joy to your celebrations. I’m excited for you to try it out and hear how it becomes a beloved part of your festive baking, just like it did for me.
Print
Christmas Cakes with Whipped Filling Recipe
- Prep Time: 5 minutes
- Cook Time: 10 minutes
- Total Time: 15 minutes
- Yield: 6 servings
- Category: Dessert
- Method: Blending
- Cuisine: American
- Diet: Vegetarian
Description
This Fancy Christmas Cakes with Whipped Filling recipe features a creamy, fluffy vanilla buttercream perfect for layering or decorating holiday cakes. The smooth and sweet filling complements festive cakes beautifully, making it an ideal choice for Christmas celebrations.
Ingredients
Whipped Filling
- ½ cup (1 stick or 113g) butter, softened
- 1 teaspoon McCormick® Pure Vanilla Extract
- 16 oz confectioners' sugar, sifted
- 2 tablespoon (2% or whole) milk
- pinch salt
Instructions
- Beat Butter: Beat butter in the bowl of a stand mixer with the whisk attachment on medium-high speed until light and fluffy, about 3 minutes.
- Add Vanilla: Add vanilla extract to the butter and mix briefly to combine.
- Incorporate Sugar and Milk: With mixer on low speed, slowly add the sifted confectioners’ sugar, milk, and a pinch of salt. Frequently scrape the sides and bottom of the bowl to ensure ingredients are fully combined.
- Whip Frosting: Once all ingredients are incorporated, increase the mixer speed to medium-high or high and whip the frosting for at least 3 minutes to achieve a fluffy texture. The mixing time can extend up to 7 minutes for best results.
- Adjust Consistency: If the frosting is too thick to spread, gradually beat in additional milk, one teaspoon at a time, until desired spreading consistency is reached.
- Storage: Store the whipped filling in the refrigerator for up to 2 weeks. Before using after refrigeration, rewhip the frosting to restore its fluffy texture.
Notes
- For a complementary cake recipe, use the White Cake recipe available at https://iambaker.net/the-perfect-white-cake/.
- Ensure butter is softened to room temperature for easier whipping and better texture.
- Sifting the confectioners’ sugar prevents lumps and creates a smooth filling.
- If using low-fat milk, adjust quantity slightly as it may affect consistency.
- Rewhipping after refrigeration is important to restore fluffiness.
Nutrition
- Serving Size: ⅙ of filling
- Calories: 220 kcal
- Sugar: 28 g
- Sodium: 40 mg
- Fat: 11 g
- Saturated Fat: 7 g
- Unsaturated Fat: 3 g
- Trans Fat: 0 g
- Carbohydrates: 30 g
- Fiber: 0 g
- Protein: 0 g
- Cholesterol: 30 mg

Leave a Reply