Looking for a snack that’s crunchy, tangy, and downright addictive? This Crispy Air Fryer Dill Pickles Recipe hits all those notes perfectly. It’s an easy, lighter take on classic fried pickles that you can whip up in no time!

Jump to:
Why You'll Love This Recipe
Whenever I make these air fryer fried dill pickles, they’re gone before I know it. Crispy on the outside, juicy and tangy on the inside, they make the perfect crowd-pleaser or cozy snack.
- Quick & Easy: Ready in just 30 minutes, making snack time a breeze.
- Lighter Crunch: Uses an air fryer instead of deep frying, so less oil without sacrificing crispiness.
- Flavor Packed: Panko crumbs and a simple spice mix create a flavorful, crunchy coating.
- Versatile Snack: Great as an appetizer, party snack, or even game-day munchies.
Ingredients & Why They Work
To make these fried dill pickles just right, I stick to a handful of pantry staples and a few fresh picks that really bring out the best texture and flavor. Here’s a quick snapshot of what you’ll need and why each ingredient shines in this recipe.
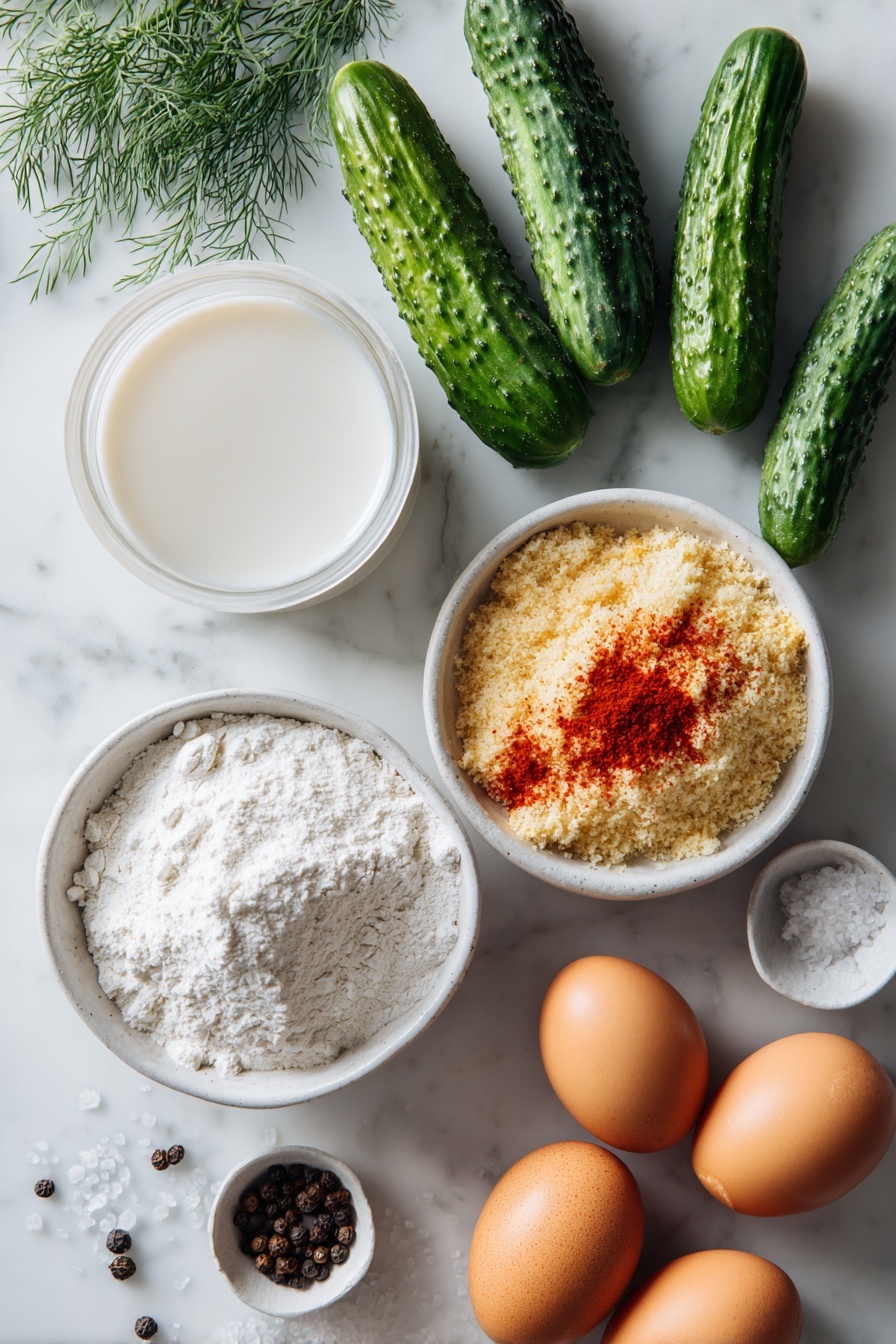
- Pickle Spear: Choose crunchy, dill pickle spears for that classic tangy punch and sturdy bite.
- All-Purpose Flour: Helps the coating stick by providing a dry base layer.
- Eggs: Acts as a glue to hold the breadcrumb coating in place.
- Milk: Thins the egg wash so it evenly coats each pickle.
- Panko Bread Crumbs: Key for that crispy, golden crust that’s light and airy.
- Paprika: Adds a subtle smoky note and beautiful color to the coating.
- Salt: Enhances all the flavors and balances the tanginess of the pickles.
- Pepper: Adds just a touch of heat and depth to the crust.
- Grapeseed Oil Spray: Keeps the pickles light and crispy without excess grease.
Make It Your Way
One of the best parts about this Crispy Air Fryer Dill Pickles Recipe is how easy it is to make it your own. Whether you like things spicy, cheesy, or need it to fit a dietary need, there’s plenty of room to get creative and make these pickles perfectly suit your taste buds.
- Variation: For an extra savory kick, I love adding a tablespoon of grated Parmesan cheese to the panko breadcrumb mixture. It adds a lovely depth of flavor and makes the crust even crispier!
- Gluten-Free Option: Simply swap out the all-purpose flour and panko breadcrumbs for gluten-free alternatives to enjoy crispy, safe-to-eat pickles without sacrificing texture.
- Spicy Twist: If you like some heat, stir in a pinch of cayenne pepper or smoked chili powder into the breadcrumb mix for a smoky, spicy bite.
- Oil Swap: Use grapeseed oil spray to keep these pickles light and super crispy. Avoid heavy oils that can make the coating soggy after air frying.
Step-by-Step: How I Make Crispy Air Fryer Dill Pickles Recipe
Step 1: Get That Air Fryer Ready
Start by preheating your air fryer to 400°F. Preheating is key to achieving that perfect crispiness right from the start. Depending on your model, this might take a few minutes—use this time to prepare your coating bowls!
Step 2: Set Up Your Coating Stations
Place your all-purpose flour in one bowl, then whisk together the eggs and milk in a second bowl. In a third bowl, combine the panko breadcrumbs with paprika, salt, and pepper. This triple-dipping method ensures each pickle spear gets a crunchy, flavorful crust that sticks well.
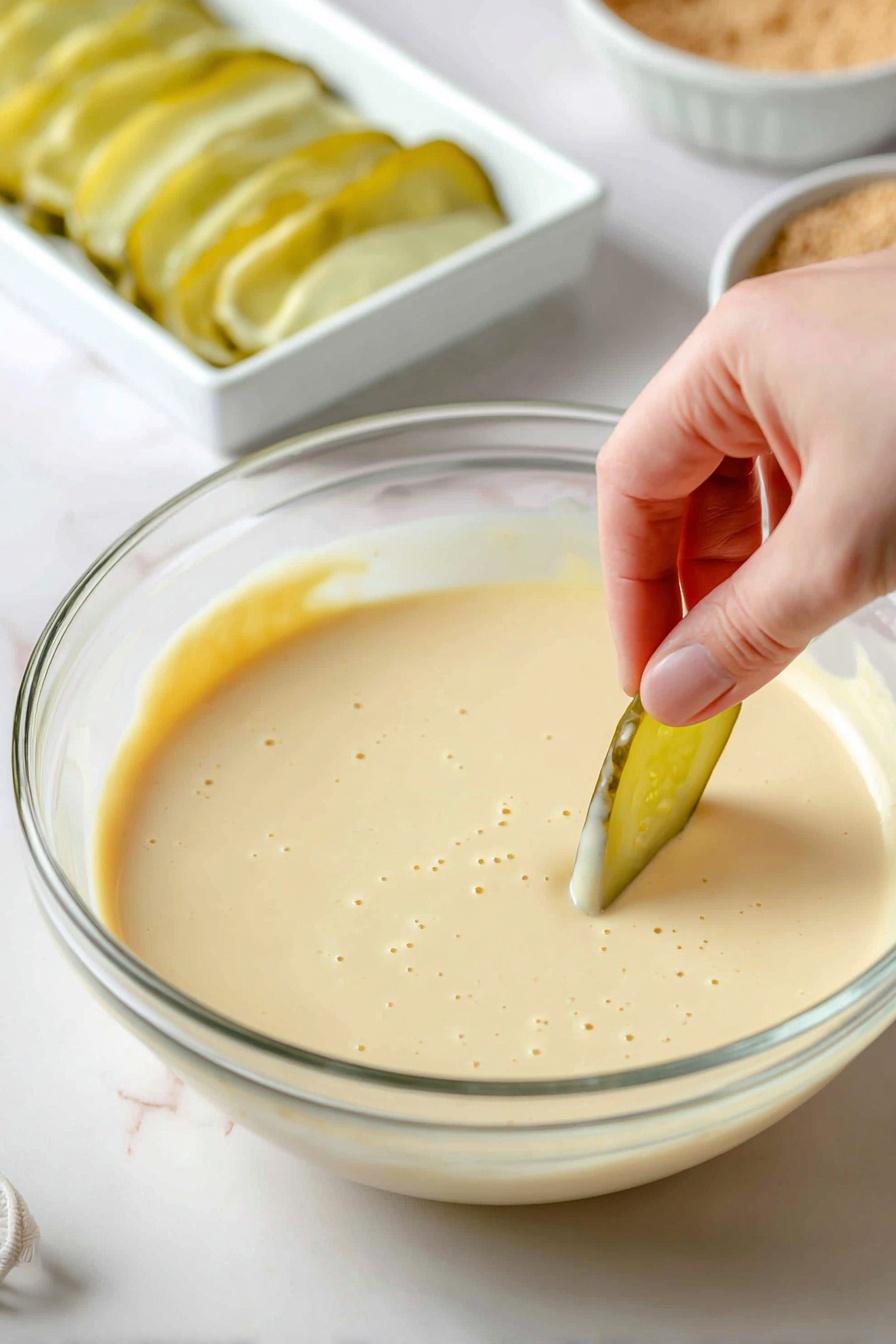
Step 3: Dry and Coat the Pickles
Pat your pickle spears dry thoroughly using paper towels. This step is super important—any excess moisture will prevent the coating from sticking. Then, dip each spear into flour, followed by the egg mixture, and finally the breadcrumb mix. Be sure to cover every inch for that golden crunch!
Step 4: Arrange and Spritz
Lay the coated pickle spears in a single layer inside your air fryer basket. Avoid overcrowding to help air circulate evenly. Lightly spritz the pickles with grapeseed oil spray—this little mist encourages the coating to crisp up beautifully without soaking it in grease.
Step 5: Air Fry to Perfection
Air fry at 400°F for 6 minutes, then carefully flip each pickle spear. Air fry for an additional 6 minutes until they’re a gorgeous golden brown and irresistibly crispy. Keep an eye on them toward the end so they don’t burn but still get that perfect crunch.
Top Tip
These tips will help you get the perfect crunch every time while keeping the process simple and enjoyable.
- Dry Pickles Thoroughly: I’ve learned that patting the pickle spears completely dry before coating is a game-changer—it prevents sogginess and helps the crispy coating stick beautifully.
- Don’t Overcrowd the Basket: Cooking the pickles in a single layer gives each spear enough space for hot air to circulate, which means even crispiness all around.
- Use Grapeseed Oil Spray: Spritzing the coated pickles lightly with grapeseed oil really amps up that golden crunch without making them greasy.
- Try Parmesan in the Coating: Adding a tablespoon of grated Parmesan cheese to the panko breadcrumb mix adds a lovely depth of flavor and crunch I never want to skip now.
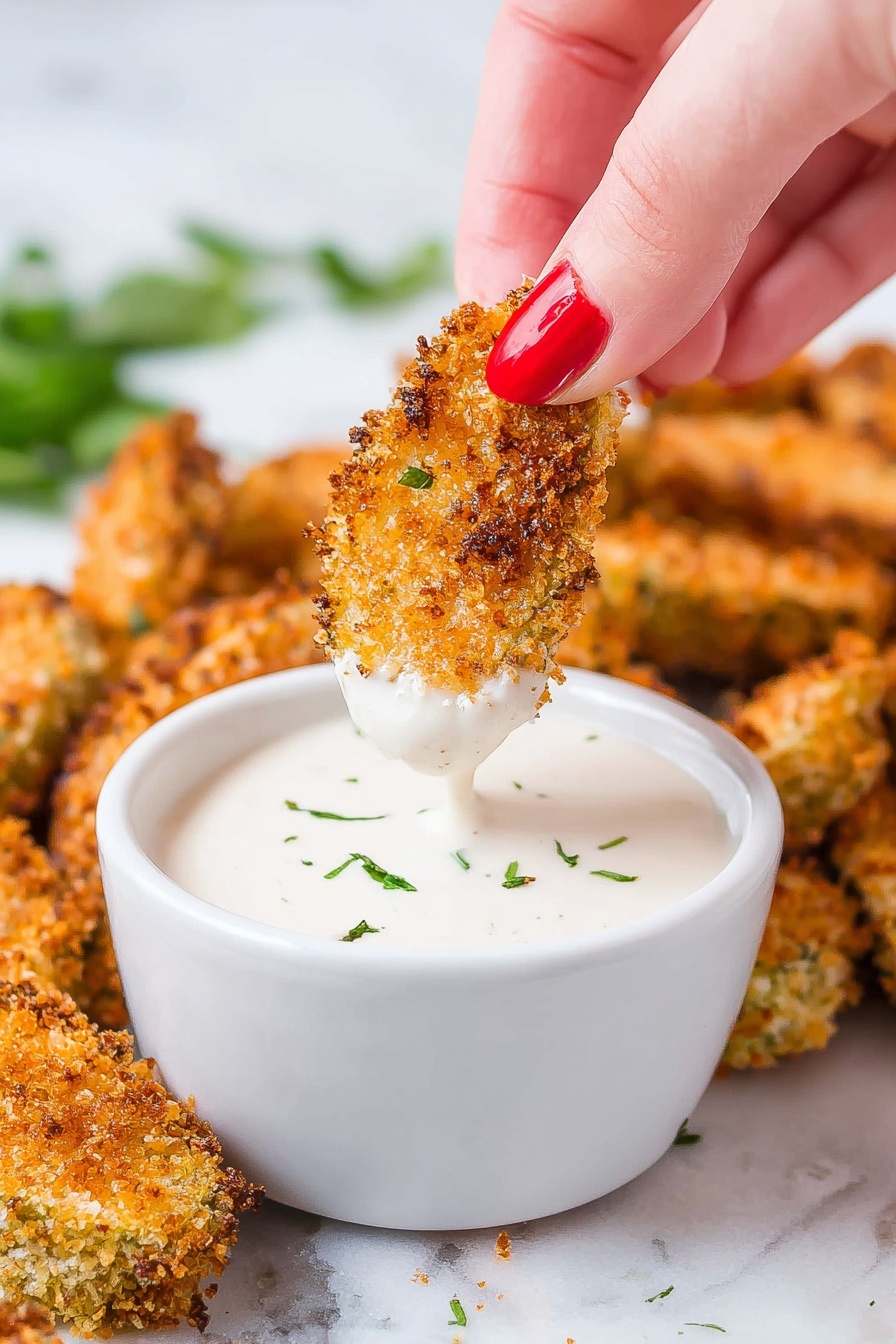
How to Serve Crispy Air Fryer Dill Pickles Recipe
Garnishes
Sprinkle a bit of chopped fresh parsley or chives over the warm pickles for a pop of color and freshness. A dash of smoked paprika on top can also enhance that smoky flavor from the coating. For a fun twist, a tiny squeeze of fresh lemon juice brightens up each bite beautifully.
Side Dishes
These crispy dill pickles pair wonderfully with creamy dipping sauces like ranch, garlic aioli, or a spicy sriracha mayo. For a fuller snack or appetizer spread, serve alongside sliders, grilled chicken wings, or a fresh garden salad to balance the crisp and tangy flavors.
Make Ahead and Storage
Storing Leftovers
Place any leftover crispy dill pickles in an airtight container and keep them in the refrigerator. They’re best enjoyed within 1 to 2 days for optimal crunch and flavor.
Freezing
While these pickles are best fresh, you can freeze them if needed. Arrange the cooked and cooled pickles on a baking sheet in a single layer and freeze until firm. Then transfer them to a freezer-safe bag or container. Use within 1 month for the best quality.
Reheating
To reheat, place the pickles back in the air fryer at 400°F for 3–4 minutes or until warmed through and crispy again. Avoid microwaving, as it tends to make the coating soggy.
Frequently Asked Questions:
Whole dill pickles can be used, but they might need to be patted extra dry and you may want to cut them into halves or quarters for easier air frying and better crispiness.
Preheating helps achieve a more consistent crispy texture, but if your air fryer doesn’t require it, you can start cooking immediately—you might just add a minute or so to the cooking time.
Absolutely! Substitute the all-purpose flour and panko breadcrumbs with gluten-free flour and gluten-free breadcrumbs to keep this recipe gluten-free without losing the crunch.
Ranch dressing, garlic aioli, spicy sriracha mayo, or even a tangy honey mustard are all fantastic choices that complement the tangy crunch of the pickles.
Final Thoughts
Making this Crispy Air Fryer Dill Pickles Recipe has been such a fun and rewarding snack experience for me. The ease of air frying combined with that unbeatable crunch makes it my go-to appetizer for any get-together or just a cozy night in. I hope these tips and serving ideas inspire you to enjoy this simple yet delicious treat as much as I do. Happy cooking and happy crunching!
Print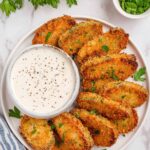
Crispy Air Fryer Dill Pickles Recipe
- Prep Time: 18 minutes
- Cook Time: 12 minutes
- Total Time: 30 minutes
- Yield: 4 servings
- Category: Appetizer
- Method: Air Frying
- Cuisine: American
- Diet: Vegetarian
Description
Crispy and flavorful Air Fryer Fried Dill Pickles are a perfect snack or appetizer. This recipe uses panko breadcrumbs and a simple coating process to achieve a crunchy texture without deep frying, making it lighter and easier to prepare.
Ingredients
Pickle Coating
- 16 pickle spears
- ½ cup all-purpose flour
- 2 eggs
- ½ cup milk
- 1 ½ cup panko bread crumbs
- 1 teaspoon paprika
- ½ teaspoon salt
- ¼ teaspoon pepper
- Grapeseed oil spray for cooking
Instructions
- Preheat Air Fryer: Preheat your air fryer to 400°F, following your model's instructions if preheating is required.
- Prepare Coating Bowls: Place flour in one bowl. In a second bowl, whisk together eggs and milk. In a third bowl, stir panko breadcrumbs with paprika, salt, and pepper until evenly combined.
- Dry Pickles: Thoroughly pat dry the pickle spears using paper towels to ensure the coating sticks properly.
- Coat Pickles: Dip each pickle spear first into the flour, then into the egg mixture, and finally coat with the breadcrumb mixture. Repeat for all spears to ensure even coverage.
- Arrange in Air Fryer: Place coated pickle spears in a single layer inside the air fryer basket, avoiding overcrowding. You may need to cook in batches for best results. Lightly spritz the spears with grapeseed oil spray to promote crispiness.
- Air Fry Pickles: Air fry the pickles at 400°F for 6 minutes. Then, flip each spear over carefully and air fry for an additional 6 minutes until golden and crispy.
Notes
- Ensure the pickle spears are well dried before coating to help the batter adhere properly.
- If you prefer extra crispy pickles, you can add 1 tablespoon of grated Parmesan cheese to the breadcrumb mixture.
- Use grapeseed oil spray or any neutral oil spray to keep the pickles light; avoid heavy oils to prevent sogginess.
- Serve immediately for the best crunch, accompanied by your favorite dipping sauce such as ranch or spicy aioli.
- For a gluten-free option, substitute all-purpose flour and panko breadcrumbs with gluten-free alternatives.
Nutrition
- Serving Size: 1 serving (4 pickle spears)
- Calories: 180 kcal
- Sugar: 2 g
- Sodium: 750 mg
- Fat: 7 g
- Saturated Fat: 1.5 g
- Unsaturated Fat: 5 g
- Trans Fat: 0 g
- Carbohydrates: 24 g
- Fiber: 2 g
- Protein: 5 g
- Cholesterol: 70 mg


Leave a Reply